Start here for you 101 in infra red digital photography

Your route to infra red digital photography - a filter for your existing camera or to use a converted camera?
Infra red photography can be great fun, with results adding a completely new dimension to your repertoire. Infra red photographs have a characteristic look, with foliage often acquiring a luminosity that contrasts vividly with their normal dark green or reddish hues. Midday skies can darken to near night-like blackness, and the form and detail in clouds can be brought out to sharp relief. Ordinary looking scenes can be brought to life.
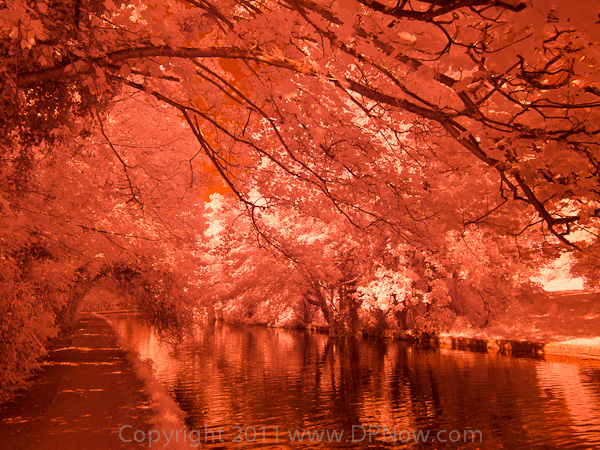
This article looks at what infra red photography is all about, how to take infra red photographs with your standard digital camera or a specially converted camera, and how to get the most out of your images through post processing, to get results like these:

(Click on above image for larger view in a new window)
What is infra red photography?

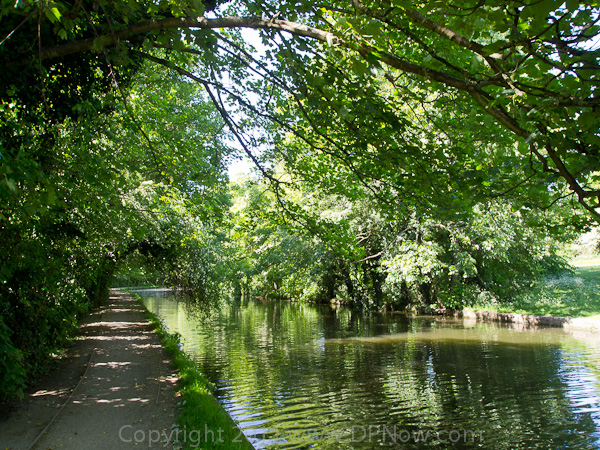
Above is a black and white infra red photo, processed from a colour infra red original. Compare it with a visible light view of the scene below:

As typical humans, we see light in the range of wavelengths from around 380 nanometres (violet) through to around 750 nanometres (red), with blue, cyan, green, yellow, and orange in between. Light of shorter wavelengths than 380nm enter the ultra violet portion of the spectrum and we can't normally register this with our eyes, although many types of animal can. At the other end, light wavelengths longer than 750nm range into the infra red portion of the spectrum, and are also invisible to humans.
Incidentally, we aren't talking about thermal infra red imaging, which is in the long wavelength infra red range (sometimes called 'far' infra red) between 815 µm (8000-15000nm). We're talking about 'near' infra red, which is a similar range of the spectrum covered by typical night vision cameras and goggles.

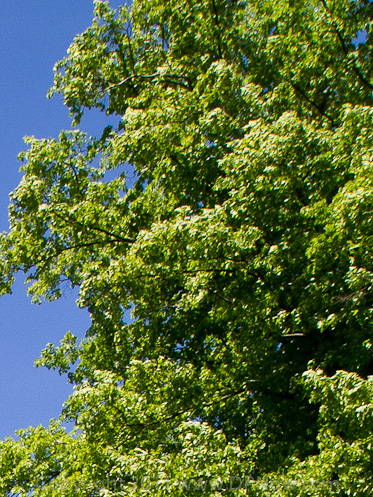
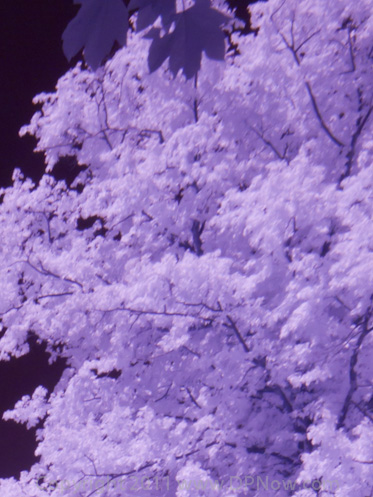
Once again, compare the normal visible light scene in colour (above) with the infra red view below, this time taken in colour and un-processed:

Infra red photographs will show brightness where infra red is reflected to the camera most. Most things that are naturally red will reflect infra red well and appear as light tones on an infra red photo. Instantly, that's weird because red in a normal photo is actually a dark hue. Foliage, especially in sunlight, which is again normally a dark hue, comes out almost white in infra red and can be spectacular. Other areas can become darker in an infra red image, like the blue in a clear sky. As many normally dark areas of a scene can become light and others can become darker, you can end up with a pseudo negative effect, which can be very surreal.

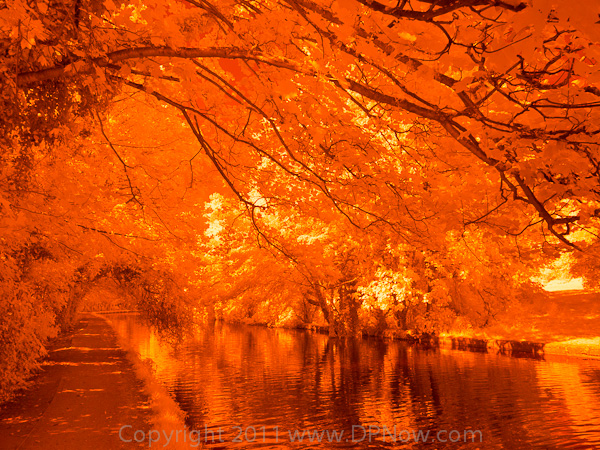
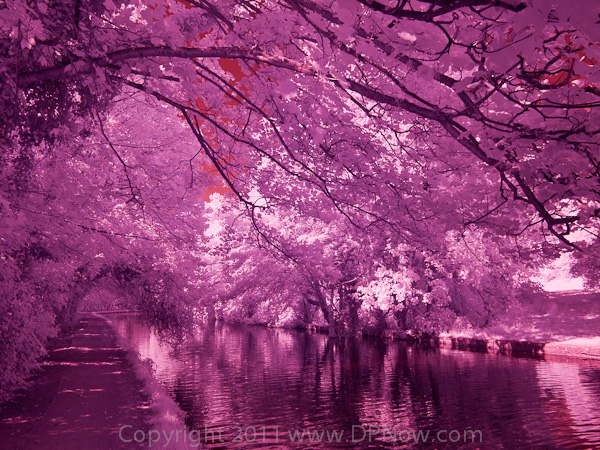
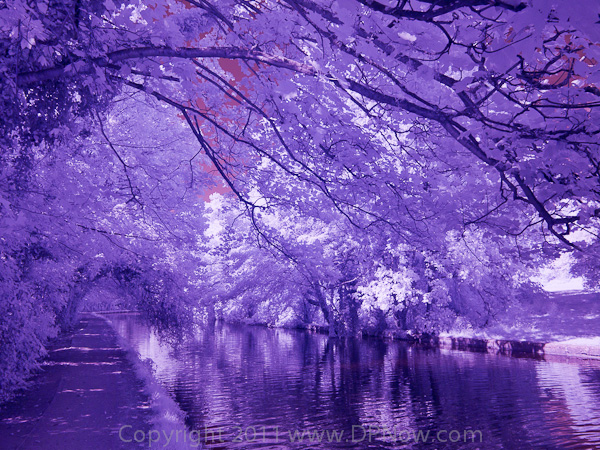
Depending on the infra red range your camera is sensitive to, you maybe able to produce false colour infra red images like this:

Reader feedback:
Discuss this story:
How does infra red digital photography work?
An introduction to the remarkable world of infra red digital photography
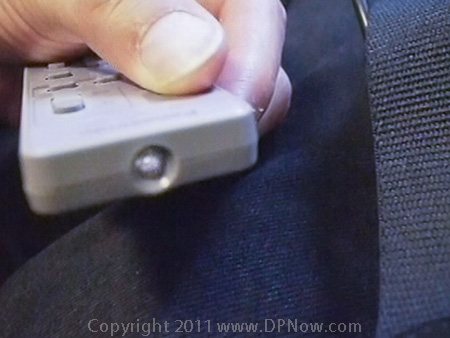
Can your camera see infra red? (move your mouse over the above image) - if you can see the blinking from an infra red remote control, the answer is yes.
Think of an infra red remote control for your TV. When you press one if its buttons you don't normally see the signalling from the IR transmitter on the end of the device with the naked eye. But point the remote control at your digital camera and there is a good chance you will see, through the live view display of the camera, the remote control's transmitter light up. That's because digital camera sensors can 'see' in the infra red spectrum as well as the visible light spectrum.
While the sensor in your camera is actually very sensitive to infra red light, that sensitivity is not ideal for good quality visible colour imaging. If you factor in infra red sensitivity to visible light sensitivity, contrast and colour balance will not be ideal, so it's normal practice for digital cameras to be fitted with a filter to reduce the amount of infra red light that gets through to the sensor. This is also referred to as a 'hot mirror'.

Sometimes materials that are opaque to visible light are are completely transparent to infra red light (move your mouse over the above image).
Infra red lens filters
Most cameras allow a modicum of near infra red light through to the sensor, enabling you to take infra red photos by using a special filter on the end of the camera lens, like a Hoya R72. This is a very dark red filter than eliminates most visible spectrum light, so the sensor only receives near infra red light. The only problem is that as most of that light is filtered out by the camera's own internal infra red filter, exposure times required can be very long - from one or two seconds to half a minute or more, depending on the camera and the conditions on the day. In some cameras the internal filter blocks so much infra red light that it is impractical to use an external infra red filter.
Even if it is practical, long exposures mean having to use the camera on a tripod or other suitable support and preclude the photographing of some moving subjects. This tends to restrict imagery to still lifes and landscapes. Also, the density of an infra red lens filter means you can't use autofocus, or even manually focus, or use the camera's meter, while the filter is mounted on the lens. You will need to estimate exposure and focus and compose with the filter removed. And even then there is a slight focus shift when using an infra red filter, so you need take this into consideration for critical focusing.
Converted cameras
To make life easier for keen infra red photographers, you can get a camera modified to make it an infra-red only camera. This involves removing the standard internal infra red filter, or hot mirror, and replacing it with a filter that blocks visible light and allows all the infra red light through. Alternatively, the camera's infra red filter can be replaced by a clear glass filter. This enables the photographer to choose what range of of the spectrum he or she wants to work with by using lens filters. Either way, the camera now operates like a normal camera should with split second exposures so you can photograph still or action scenes.
DIY project?
Some bold individuals even set themselves the challenge of converting their own cameras, and kits for some of the more popular cameras are available for DIY conversions. One thing to consider when converting DSLR cameras is that infra red light focuses slightly differently to visible light. This means that the auto focusing and maybe the optical viewfinder may not be trustworthy for focusing criticality in infra red.
The most commonly used photographic infra red filters block light with wavelengths shorter than 720nm. This does mean some visible spectrum light gets through, so you don't just get images of exclusively red tones. Attractive false colour images can be produced, as well as great quality black and white infra red images.
Filter options
If you use a filter that blocks around 800nm or shorter wavelengths, no visible light gets through, so your images will be monotone - great for black and white - especially if you don't want to spend time with a lot of post-processing, but no use for false colour images. On the other hand, some photographers use filters around the 650nm range, which admit a reasonable amount of visible colour, enabling more spectacular false colour infra red images than when using a 720nm filter, but making it slightly harder to get the best black and white image quality.
Potential problems
Extreme corner of the frame in visible light
Same corner area in infra red and you can see it's much softer
Infra red photography does pose some interesting challenges. Camera optics are designed specifically for visible light. Infra red light refracts slightly differently and so some lenses that work perfectly well in normal visible light conditions can perform surprisingly poorly in infra red light.
Lens performance issues
One very expensive super wide angle lens I tried needed to be stopped down a fair bit before corner sharpness became anywhere near acceptable. This is a lens that performs superbly in normal photography. And yet a cheaper lens appeared to work better in infra red. My personal suspicion is that if a lens uses a highly complex design that attempts to correct a great deal of visible optical aberrations, there is more to fail in infra red for that lens. A simple lens may exhibit less aberrations in infra red as there are less corrections that fail to work properly in infra red.
Hot spots
Hot spots can be a problem with infra red. This is where the centre of the frame starts to glow and lose contrast. A number of factors can contribute to this, from ineffective internal baffles behind the lens, so stray infra red gets reflected around the inside and into the lens. High-tech anti-reflective lens coatings that work well in visible light may also be ineffective with infra red light. The net result is stray infra red light 'fogging' the centre of the sensor. Stopping the lens down could be a partial remedy, although some report that using the lens aperture wide open works for them, theoretically because this prevents stray infra red light from being reflected off the lens aperture iris. The only firm advice I can give is that the issues with hot spots are not consistent, from lens to lens or from a point of view of lens aperture settings. If you encounter the problem you will simply have to experiment.
Image noise
Image noise can be a problem if you are not using a converted camera because very long exposures are required. Ensure that your camera has its dark frame subtraction mode, variously known as a long exposure noise reduction mode or similar, switched on. This will ensure that long exposure hot pixels will be cancelled out. Also, consider using a low ISO sensitivity despite the long exposures. Whereas ISO 800 might require a 1 second exposure, ISO 100 will only require an 8 second exposure and you will avoid noticeable noise grain and benefit from a greater dynamic range.
Shooting conditions
In most circumstances you will need clear or semi-clear skies with good sunshine to get really striking infra red pictures. Over cast or hazy conditions may not generate enough contrast for your images to 'pop'. If you have a converted camera, you can consider photographing at night time. After all, this is how night vision goggles work and night vision modes in some video cameras. But you may need supplementary infra red lighting, like infra red flash guns, for example. But it's worth experimenting.
Focus calibration
Contrast detection autofocus as used by compact cameras and non-DSLR system cameras, works fine with converted cameras, but the range-finding AF systems in digital SLRs will need re-calibrating. You may find that you get inconsistent focusing accuracy anyway because the viewfinder and focus screen in a DSLR is calibrated for visible light, not infra red.
Neutral density and polarising filters won't work
Again, if you have a converted camera, you may have problems achieving a long enough shutter speed for time slow motion blur effects. This is because neutral density filters you might use to moderate the brightness of a scene in normal photography will almost certainly be transparent to infra red. The same goes for polarising filters.
Infra red and white balance
White balance, or colour temperature - in digital camera terms - is specifically concerning visible light images, but altering the camera's white balance setting will have a marked effect on your infra red images. I highly recommend that you record infra red photos in RAW format because it's very easy to adjust white balance from a RAW file and correspondingly harder from a JPEG.
In general, if you are aiming to produce false colour infra red images, you will probably aim to apply a grey level based on areas where there is foliage. I find that a camera white balance setting of around 2200K or 2000K gets closest to this.
Below, just as an exercise, you can see the way a converted camera produces colour infra red images at different Kelvin settings:
10000K
5500K
3000K
2200K

2000K
Visible light, around 5000K
Processing false colour infra red
If you have the right kind of infra red sensitivity, allowing some visible colour through (720nm and shorter), with some knowledge and application you can produce some interesting false colour infra red results. Here is an example using a 720nm converted camera.
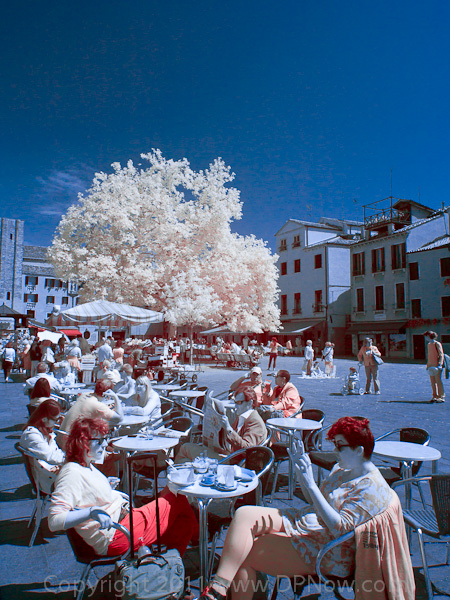
This picture benefits from bright sunshine and clear conditions.
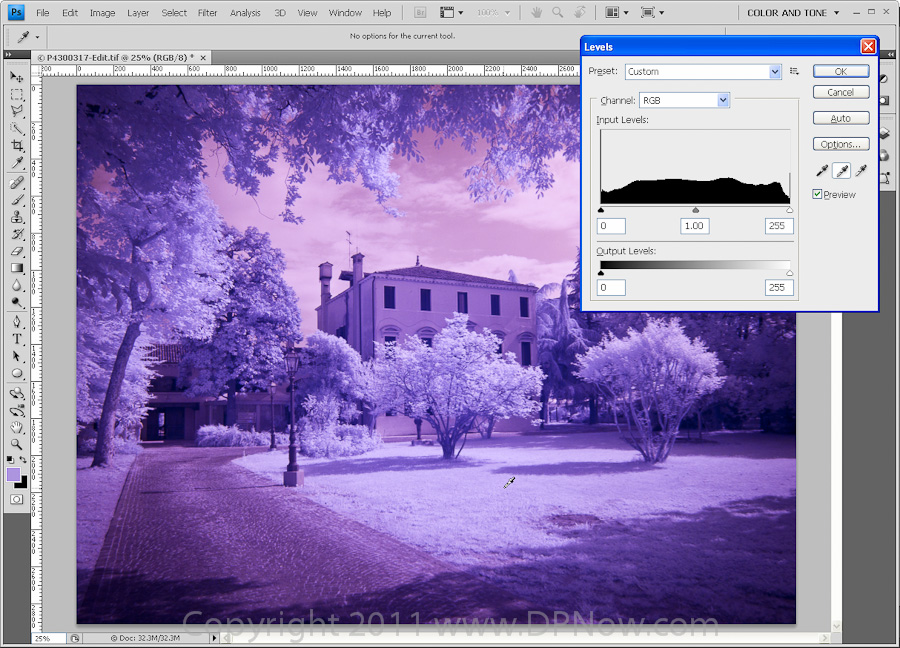
So here is a simple step by step guide to producing false infra red colour by swapping the red and blue channels. Here, we're using Photoshop, but the procedure should be adaptable to other image editors that have an equivalent to Photoshop's channel mixer.
All the following screen grabs can be expanded in to a larger view in a new window by clicking on them:

1.Adjust the grey point via the Levels tool. For natural scenes like this, with a lot plants and trees, aim for a sampling area that would be green foliage in the visible light view. Here I'm targetting the grass.

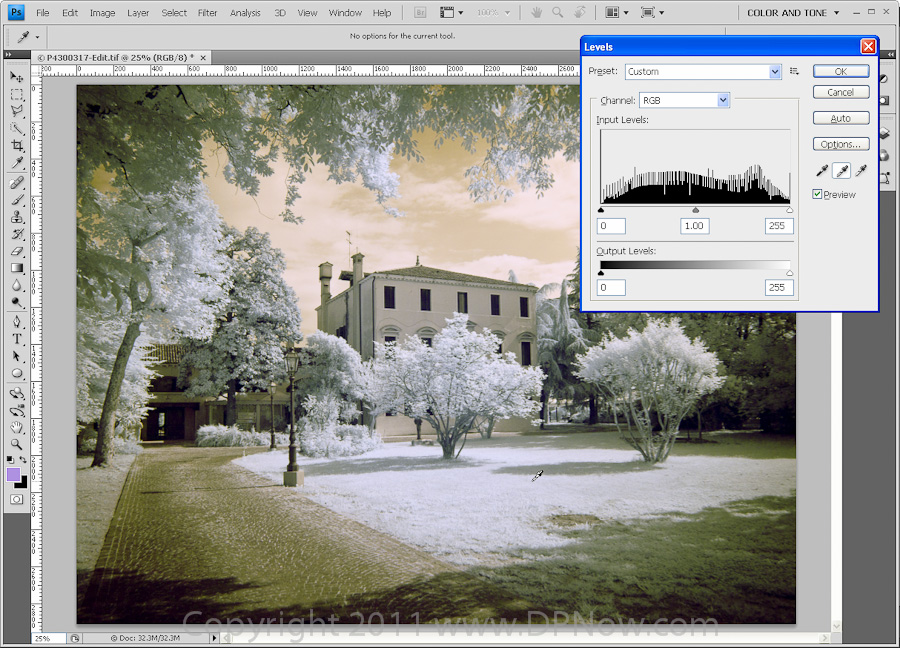
2. The colour has shifted dramatically, but remains essentially limited in tone.
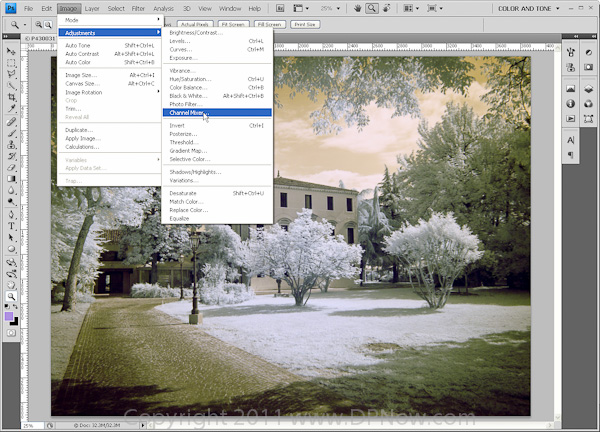
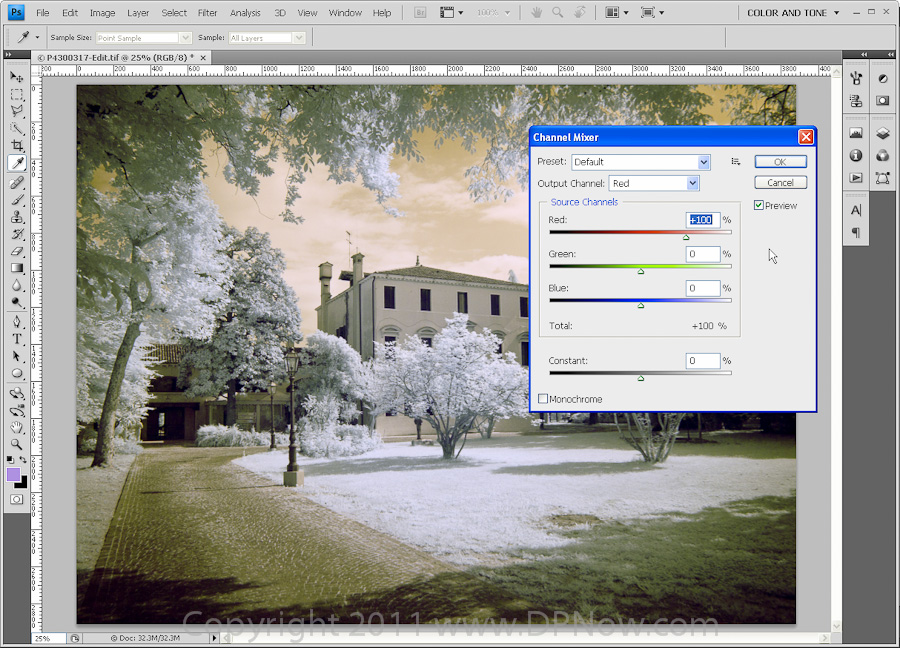
3. The sky is reddish, and to make it a more natural looking blue we need to make the reds blue and, in return, we'll make what was originally red - blue. This requires the use of the channel mixer.

4. To start with the red channel, as you would expect, is set to 100%
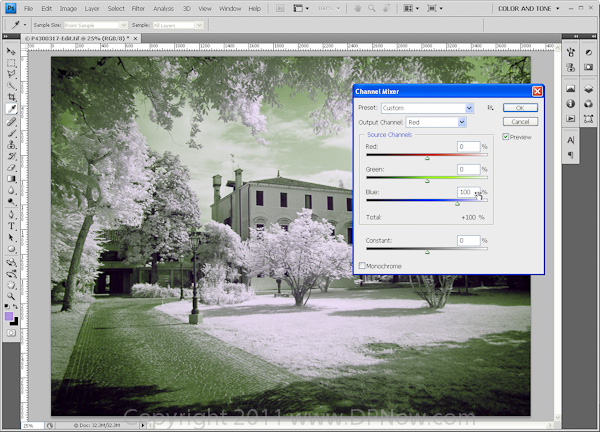
5. To swap the red and blue channels you need to start by setting the red channel's red level to zero, and balancing this by setting the red channel's blue level to 100%.

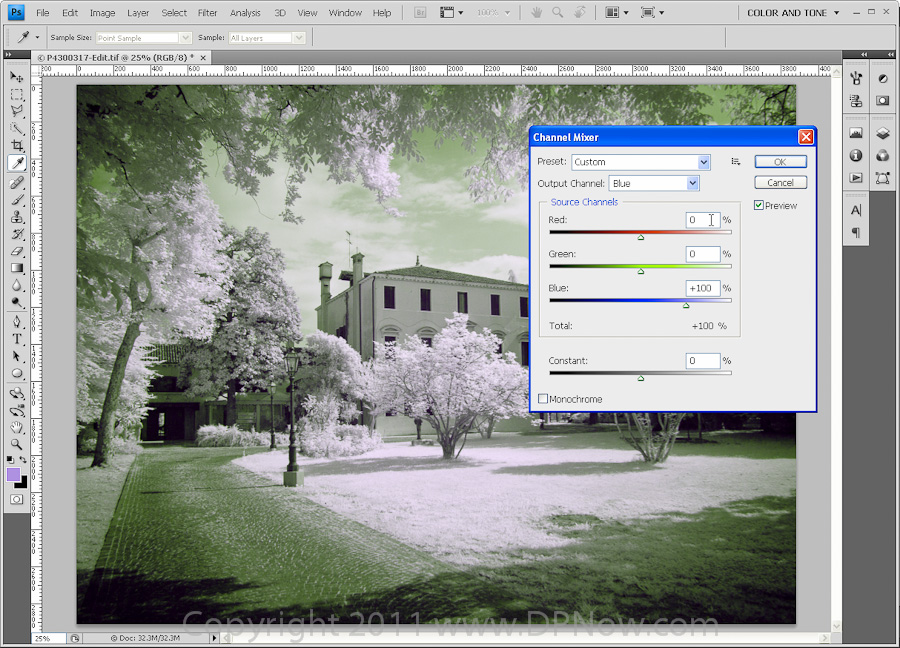
6. Next, change to the blue channel and do exactly the opposite.
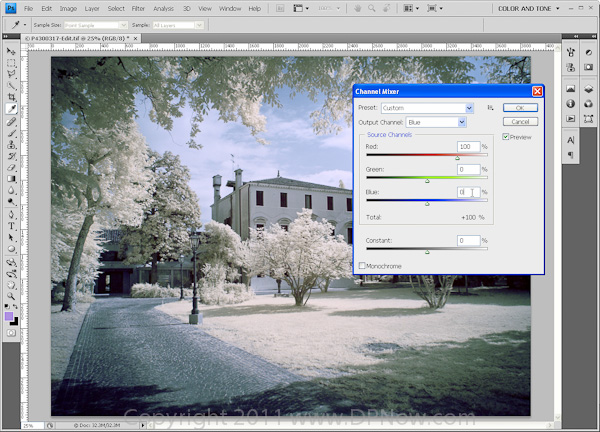
7. So in the blue channel, make the red level 100% and the blue level zero.
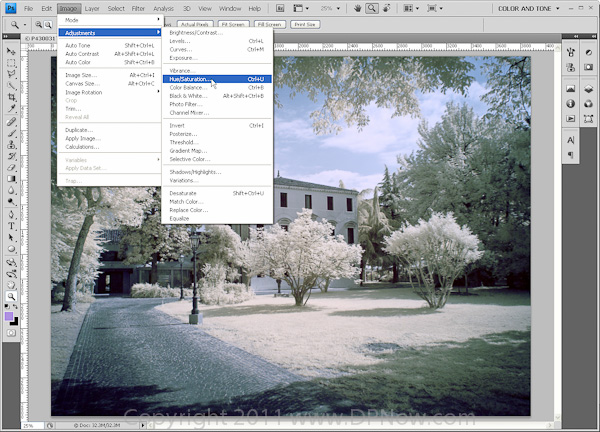
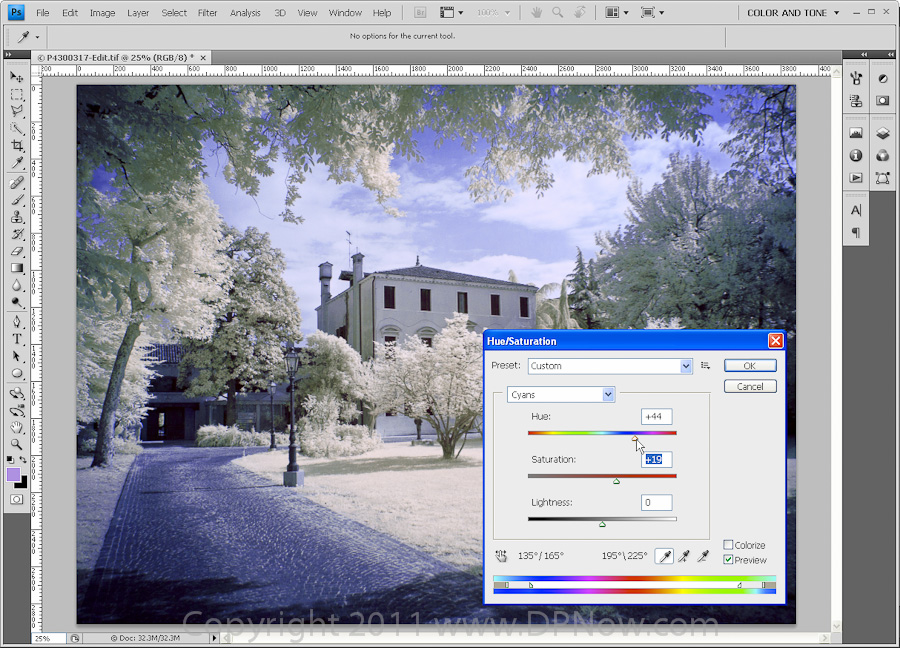
8. Now the sky is blue, sort of. But that can be improved. Often the sky will have too much cyan in it. To fine tune this we can use the Hue and Saturation adjustment tools.

9. Choose Cyan as the hue to adjust and then experiment by moving the slider until you get the optimum blue hue. You can then adjust its density by using the saturation adjustment slider. Sometimes you can get some very fine-tuned improvements by adjusting other hues.
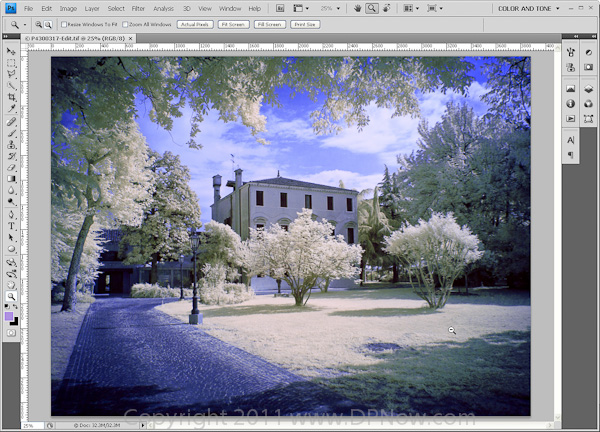
10. And here is the final result. While the sky and the clouds look relatively normal, everything else looks weird and surreal.
Black and white infra red
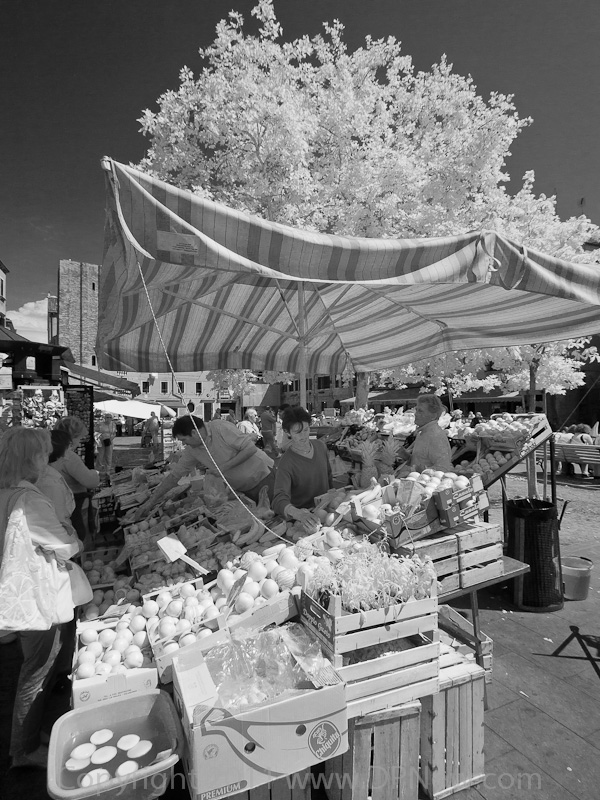
Monochrome results in infra red are the easiest to achieve. It can be as simple as desaturating a colour infra red original, Best results will involve using a colour to black and white tool, like the Custom Greysacale action in Photoshop, so you can adjust the density of individual shades of grey formed from specific colour hues.If you already know how to do this for converting traditional colour photos to black and white, the procedure is exactly the same for infra red colour to mono.
Click on each of the following images to open a larger view in a new window:

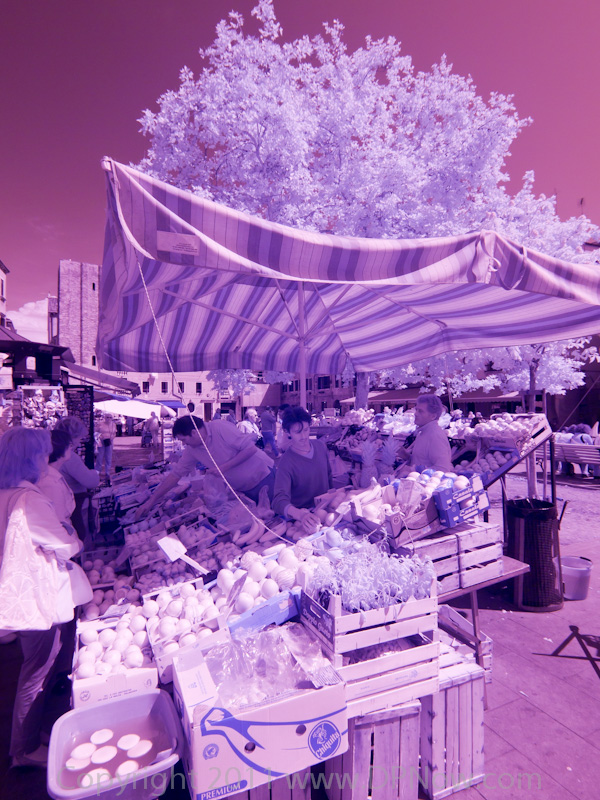
An unprocessed infra red colour original
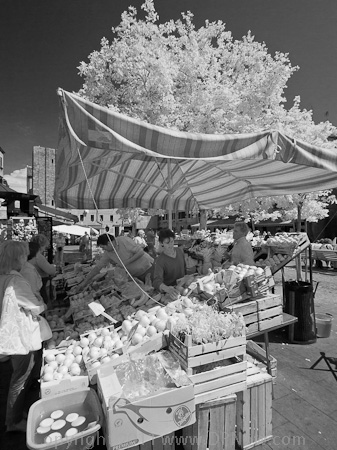
Converted to black and white
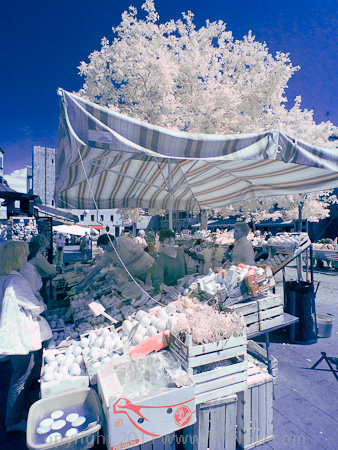
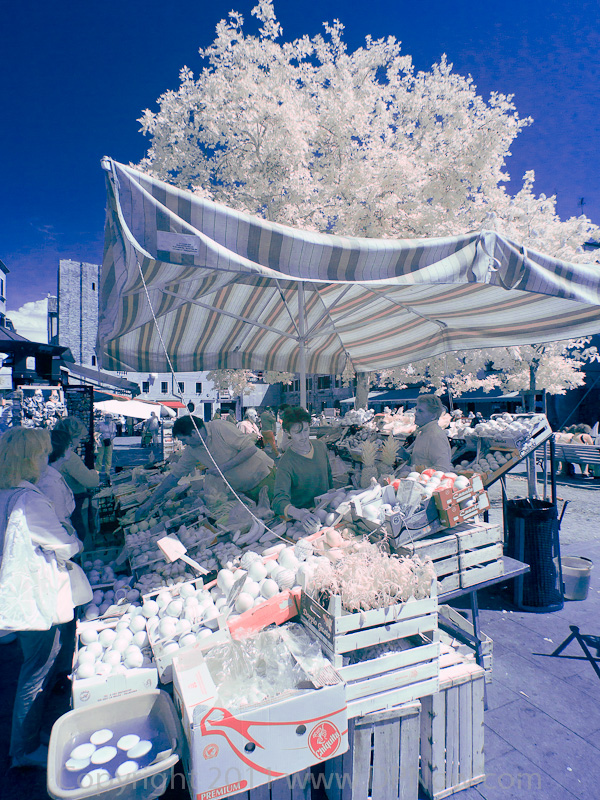
The false colour version created by swapping the red and blue channels