Darken or lighten the corners of your photos for that special vignette effect
This article shows you how a little darkness (or light) in the peripheries of your photo might make a positive difference. We're talking vignettes. It's a French word that, curiously, is literally translated as 'label' or 'thumbnail' but more classically describes the fancy decoration that adorns the beginning and ends of chapters in a book. But for photography a vignette is the intentional or unintentional darkening or lightening of the edges and corners of a picture. It's a popular enhancement of portraits like this one, below:

A classic portrait dark vignette
The surrounding, usually elliptical, region can either be darkened or lightened and this has the effect of accentuating the central subject in the composition.
A vignette can also be used more subtly to enhance an otherwise flat subject. Run your mouse pointer over the picture below and you will see the effect of such a vignette on the scene:

By running your mouse pointer over the above picture you can switch between the versions with and without the vignette.
As I hope you can see the effect is very subtle, but also very powerful, transforming a rather lifeless image into one with notably more drama. Only a modest darkening of the periphery is needed, not a completely black framing of the subject like in the portrait vignette example.
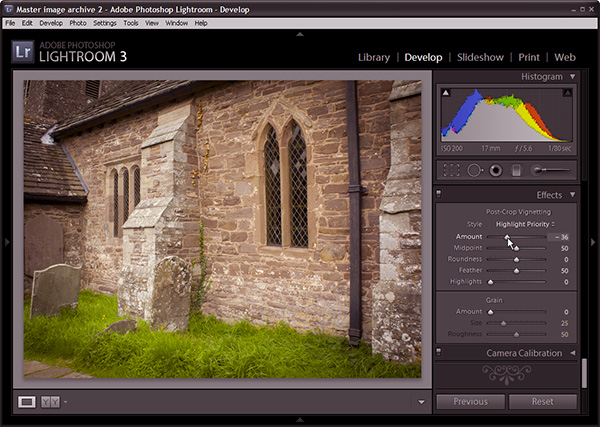
Post Crop Vignette tool in Lightroom 3 (click for a larger view in a separate window)
The vignette effect shown in the church picture was achieved using a tool in Adobe Photoshop Lightroom 3 called Post Crop Vignette. I'll also show you a simple way of creating vignettes in Photoshop Elements. The original version of Lightroom featured a vignette tool but this only worked across the whole original frame. Since then Lightroom has been enabled to apply a vignette that is very adjustable in size and density and applicable to any cropped area, hence the term 'post crop' vignette.
Ironically, lens designers work incredibly hard to avoid natural vignette or corner shading effects as these are considered to be the result of optical design flaws. But here we are, undoing all that good work for effect!
Make vignettes in Photoshop Elements
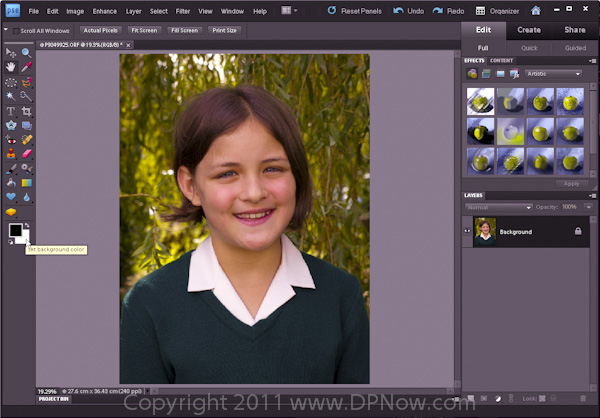
(click for a larger view in a separate window)
Here we are going to recreate the dark vignette in the portrait the start of the article using Photoshop Elements. To do this we are going to erase the areas to be darkened and to reveal a black background, so first set the background to black in the toolbox.

(click for a larger view in a separate window)
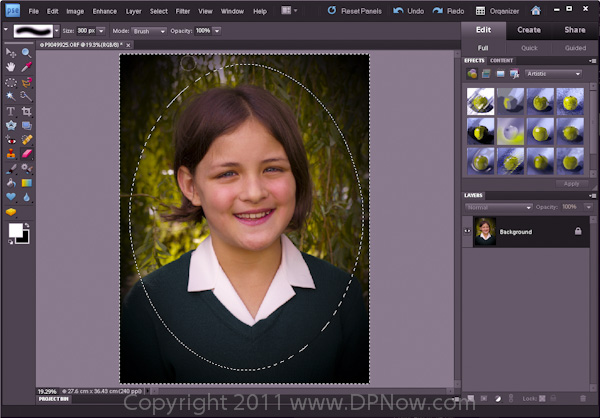
Next, select the elliptical marquee tool in order to create the shape, or mask, of the vignette.

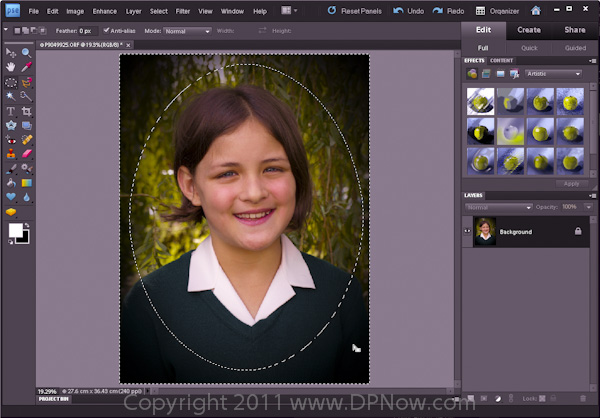
(click for a larger view in a separate window)
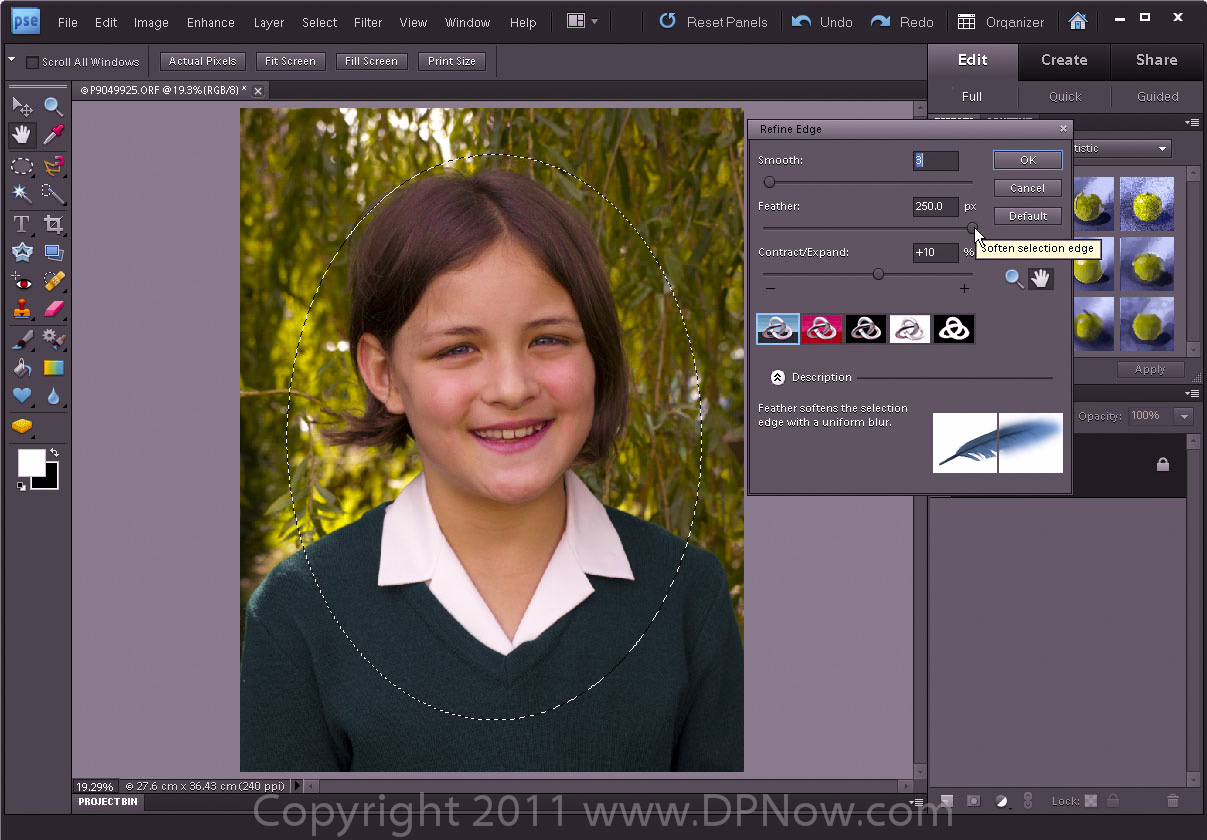
A vignette with a sharp edge can be used if you like, but here I'm going to soften the edge and fine-tune the size of the vignette by using the Refine Edge adjustments off the Select menu. Depending on the resolution of your image you will need to adjust the feathering of the marquee edge and you can contract and expand it to suit your needs. Some trial and error may be required so do make use of the Undo and Redo commands in the Edit menu.
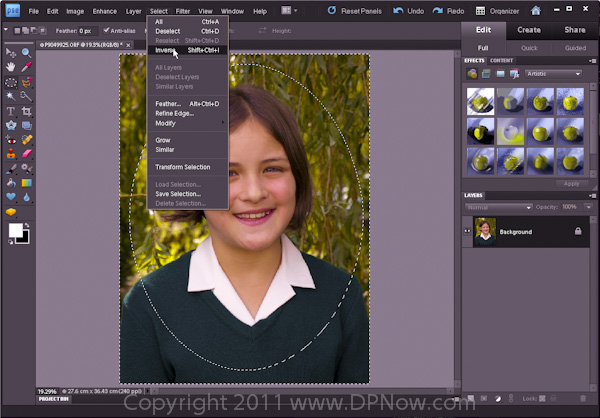
(click for a larger view in a separate window)
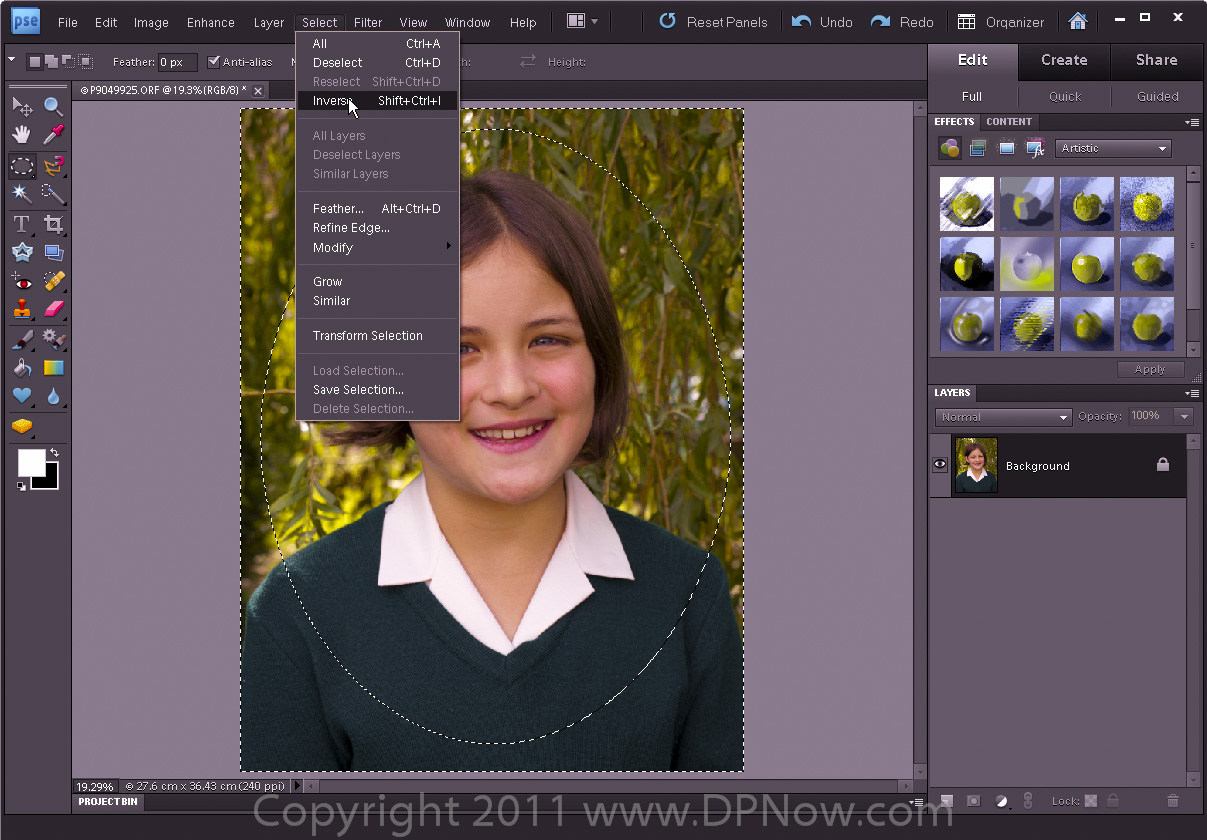
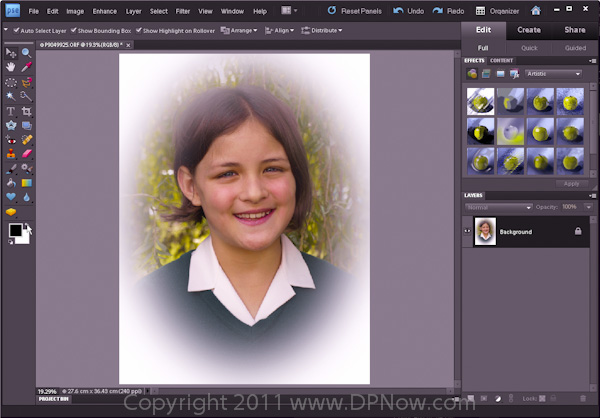
Once the size, position and edge softness of the marquee has been fine-tuned, use the invert command in the Select menu to switch from masking the area within the ellipse to the area outside the ellipse.
(click for a larger view in a separate window)
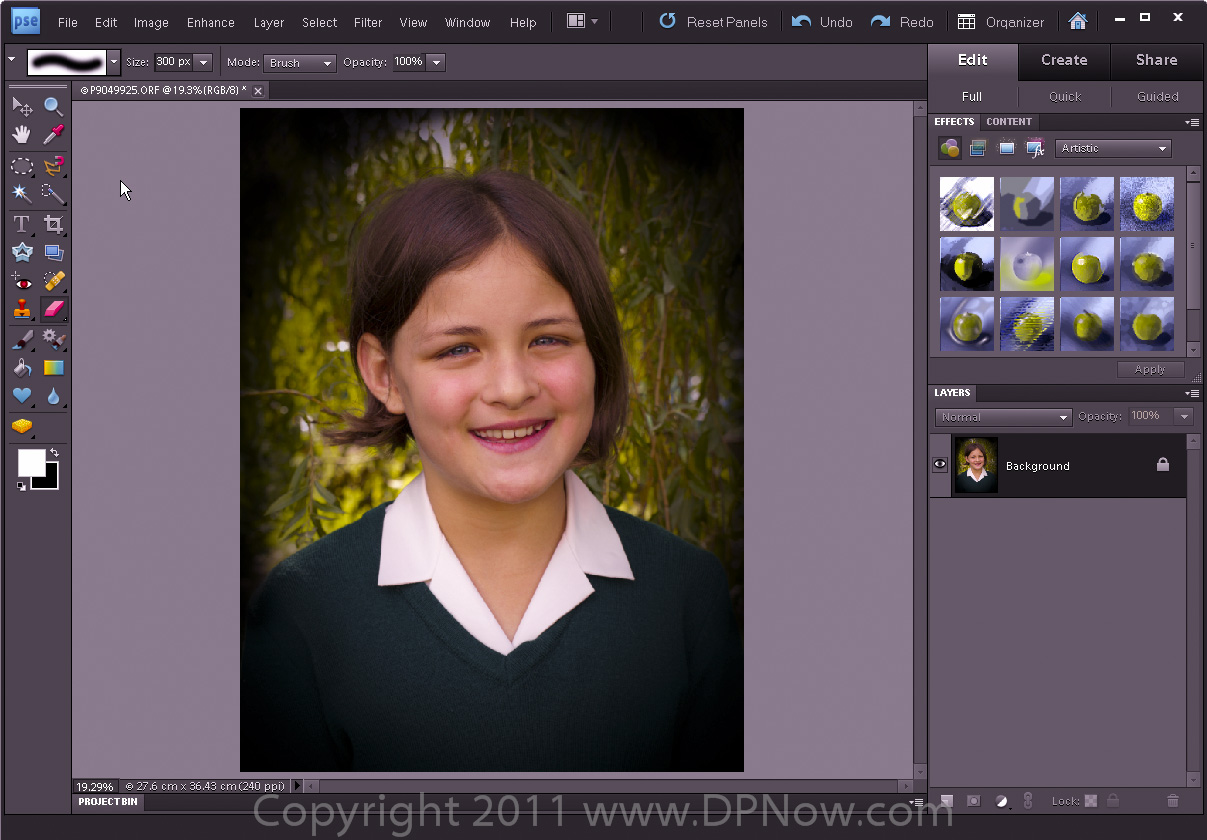
Now just hot the delete button and the area masked will be erased to reveal a black background. Not all of the area we want to darken become dark because of the mask feathering.
(click for a larger view in a separate window)
It may be necessary to do some localised work on remaining areas of lightness using the eraser tool.

(click for a larger view in a separate window)
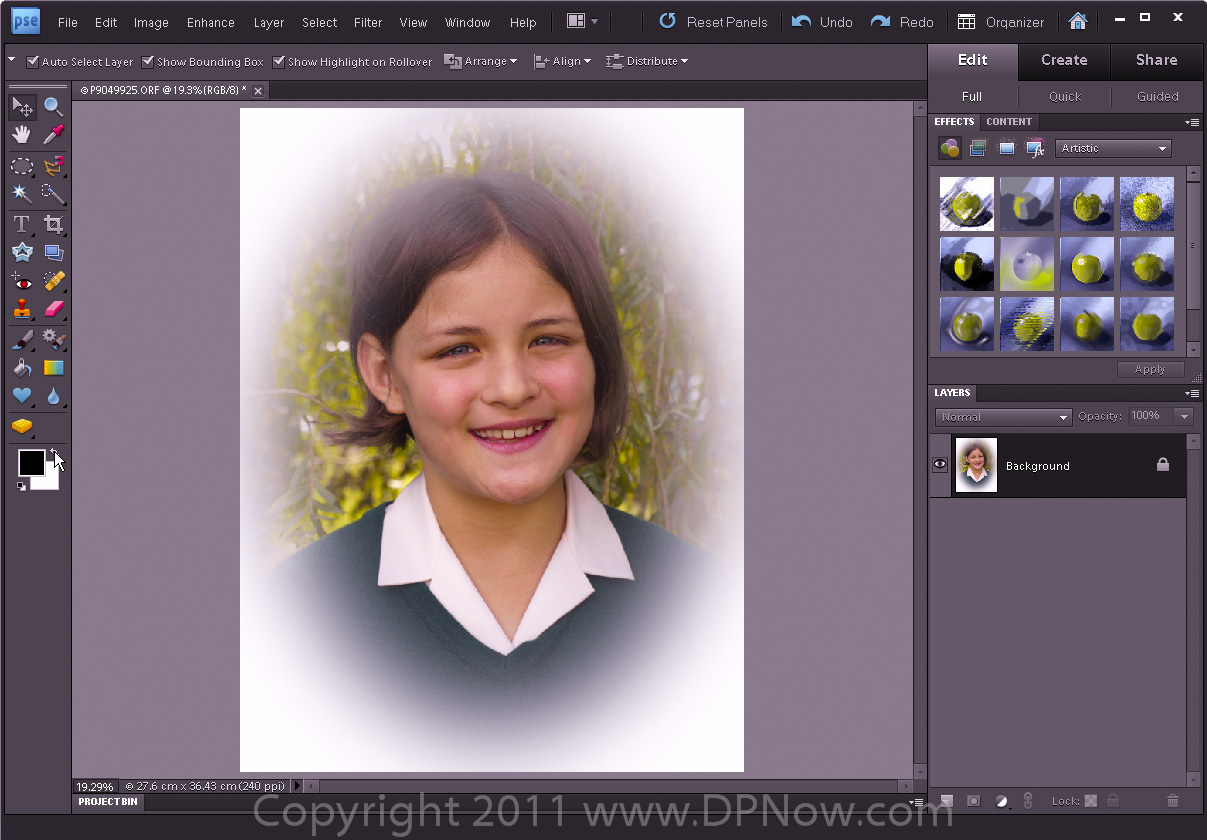
Finally, we have a uniform soft-edged dark vignette. But of course it could be a light vignette if you prefer:
(click for a larger view in a separate window)
Instead of setting the background to black, set it it white in order to get the light vignette.
Don't forget that you can use more subtle applications of vignette to enhance all manner of photos.
If you have some results that you are proud of as a result of this tutorial, why not share them with us via our online gallery and discussion forum?
Reader feedback:
Discuss this story: