Puppet Warp - select and re-shape and position image components
See our Photoshop CS5 previews Part1 and Part 2
In our third instalment of our preview of Photoshop CS5 we'll examine the new Puppet Warp tool.
Puppet Warp is a new selection tool that lets you change the position and shape of a selected area with a fair degree of control through the use of adjustment nodes.
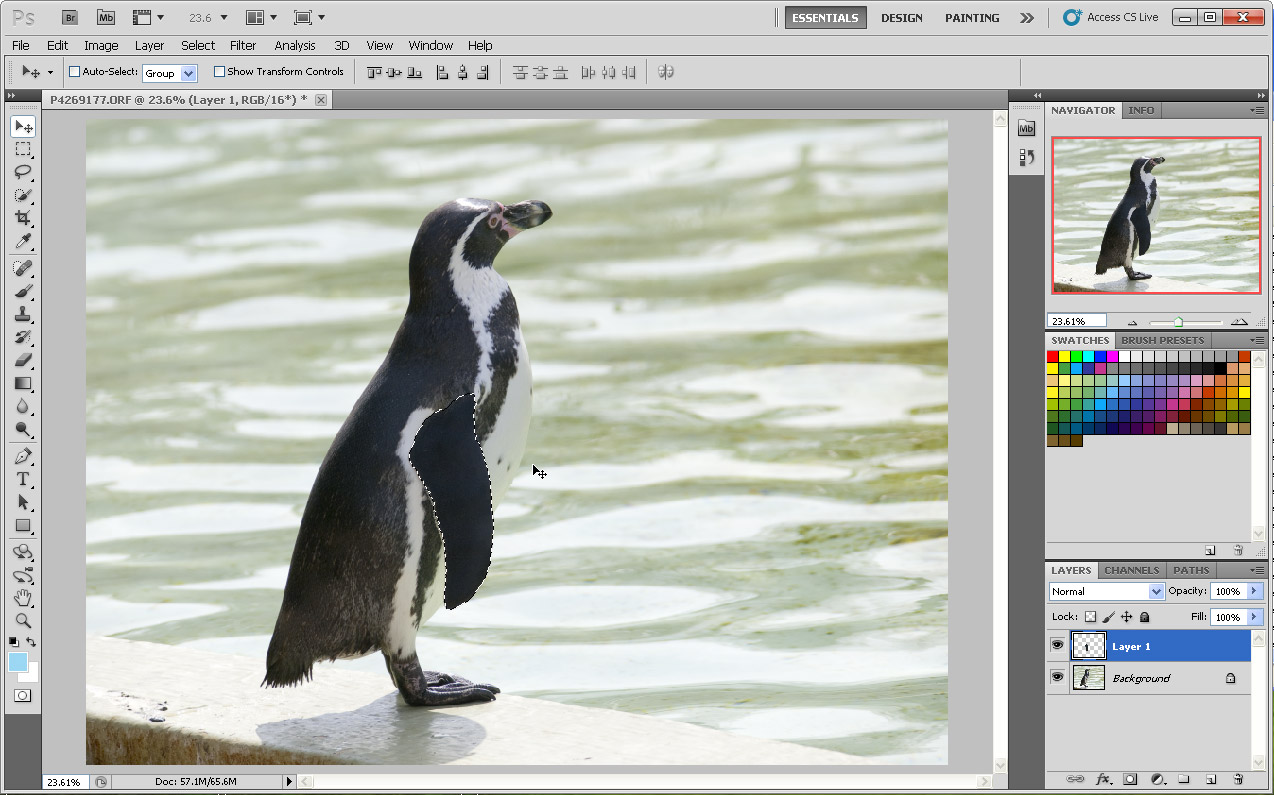
Take the penguin in the picture below

(Above, click image to open a larger view in a new window) We're going to change the penguin so that it appears to be holding its wing out instead of its resting position as you see it in the original photo. First select the wing.
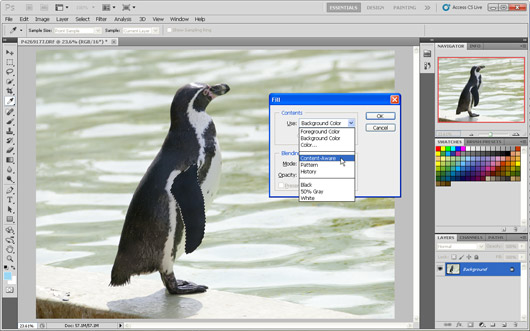
(Above, click image to open a larger view in a new window) Next, we'll use the other new feature we have already looked at, Content Aware Fill, to replace the area under the wing after the it has been transformed.To do this, go to EDIT > FILL and in the fill dialogue select Content Aware Fill.

(Above, click image to open a larger view in a new window) Next, logically you would CUT the selected area (EDIT > CUT). We's use CUT because we'll be pasting the selected area, in this case the wing, into a new layer where it can be manipulated independently of the reset of the original image. However, CUT doesn't seem to work with Content Aware Fill, at least not in the beta release of Photoshop CS5 we're using here. Instead, using DELETE to cut the selected area works as required. As you can see here the Content Aware Fill has struggled to produce a good result and unfortunately the algorithm has brought in the background water detail instead of the penguin's own detail to fill most of the area that has been lifted. No matter, it can be tidied up later.
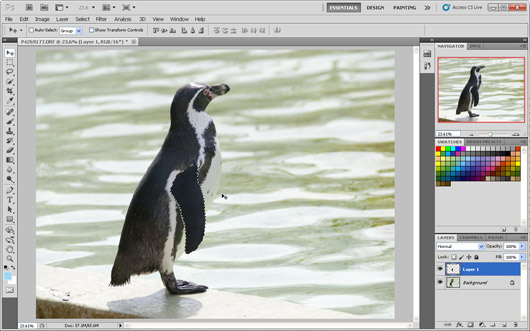
(Above, click image to open a larger view in a new window) If you look in the layers palette you can see that we have pasted the wing back into a new layer. Make sure that the wing area is re-selected in the new layer.
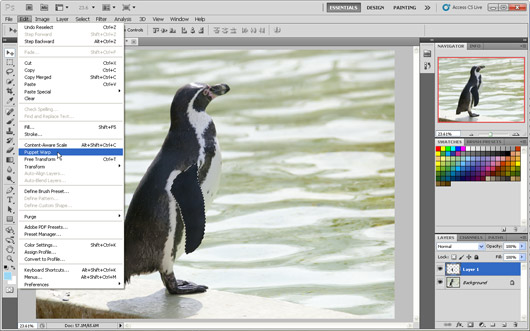
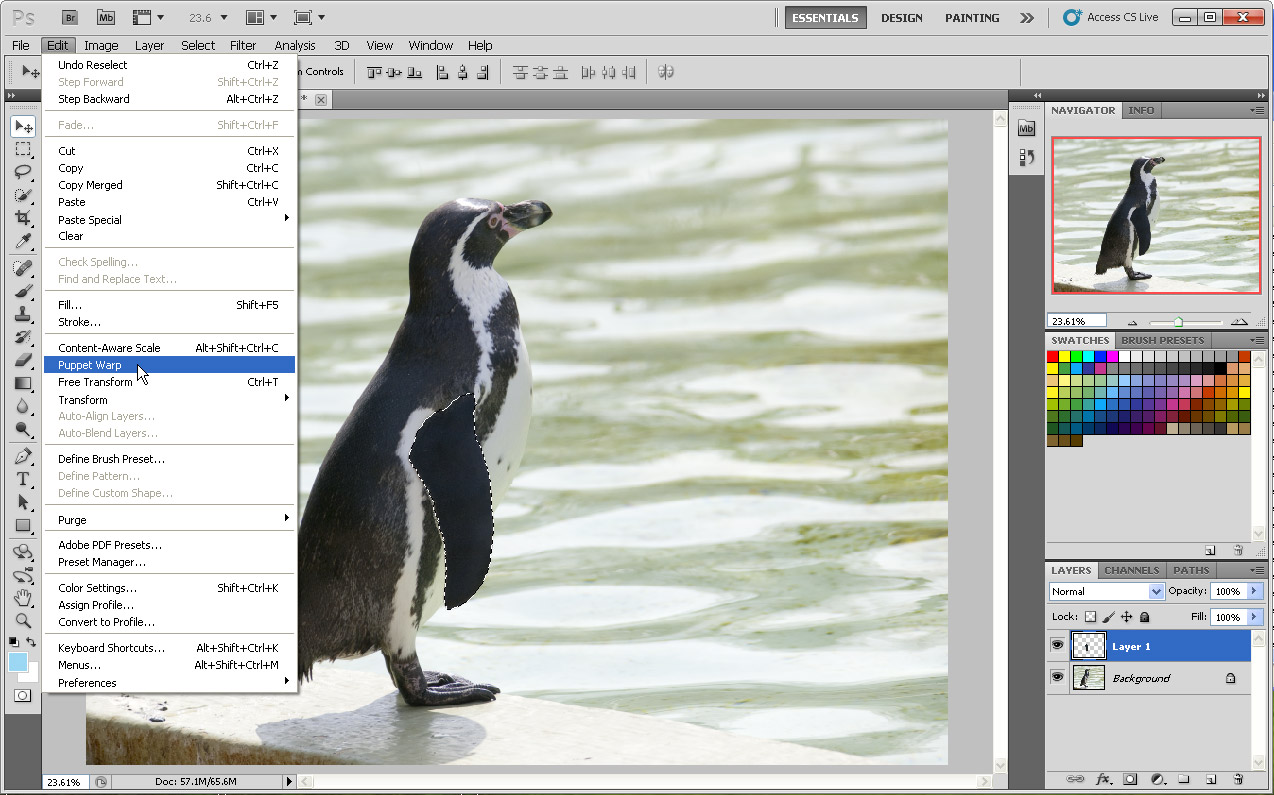
(Above, click image to open a larger view in a new window) We now select Puppet Warp from the EDIT menu.
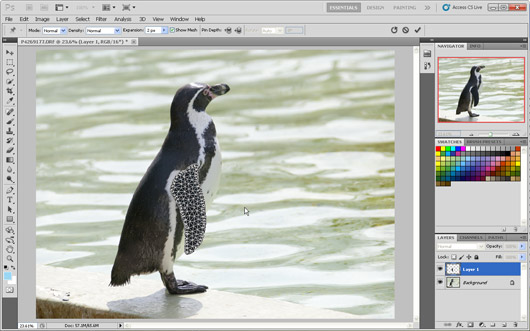
(Above, click image to open a larger view in a new window) Puppet Warp covers the selection area (the wing) with a mesh of polygons.

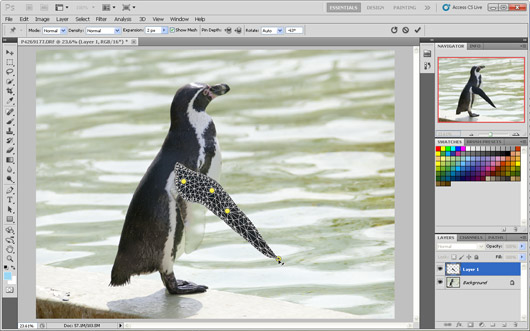
(Above, click image to open a larger view in a new window) Next, click on the mesh to apply adjustment nodes which are represented by yellow dots. Each node can be dragged with the mouse. This will stretch and pull the meshed area, with the nodes acting as control points.

(Above, click image to open a larger view in a new window) Each node can be reconfigured independently, or removed, as desired. You can also hide the mesh if you like.
(Above, click image to open a larger view in a new window) Just to show you how much flexibility you have, I have pulled the wing right out by dragging the node on the wing tip. The more nodes you create, the more control you give yourself to pull and bend the meshed area.

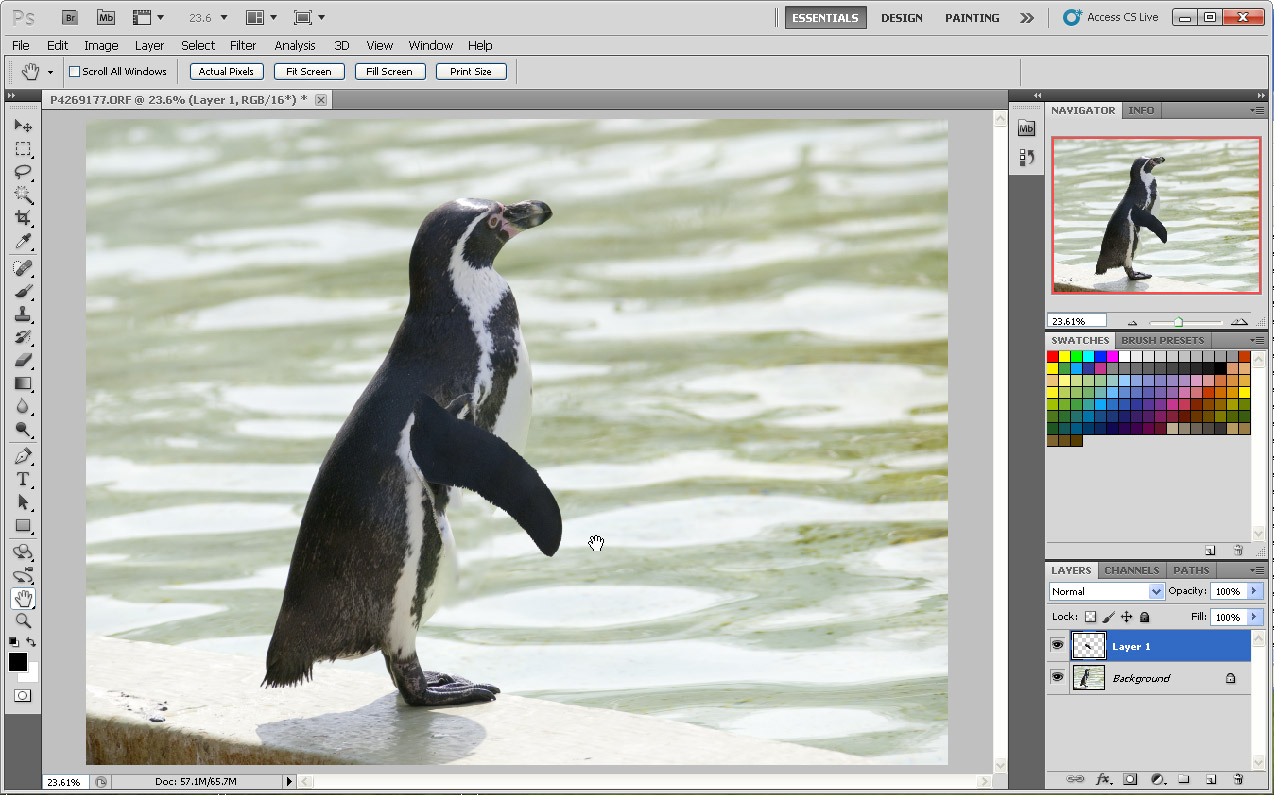
(Above, click image to open a larger view in a new window) Here is a more realistic re-positioning of the wing.

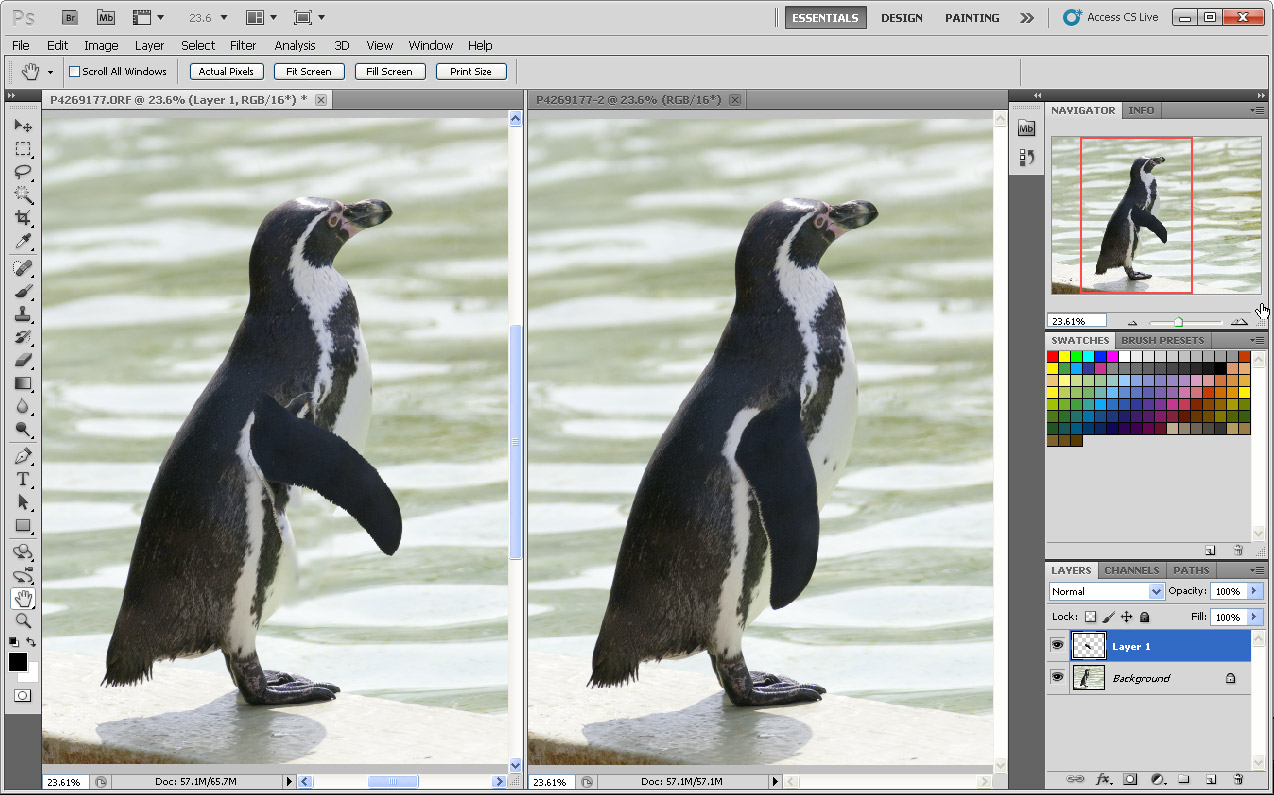
(Above, click image to open a larger view in a new window) And, finally, you can see the original on the right and the re-jigged penguin on the left. All that you need to do now is to tidy up the areas that were not processed well by Content Aware Fill, and you're done.
Look out for our next Photoshop CS5 preview instalment soon.
Reader feedback:
Discuss this story: