Combine two polarising filters to make variable neutral density filter
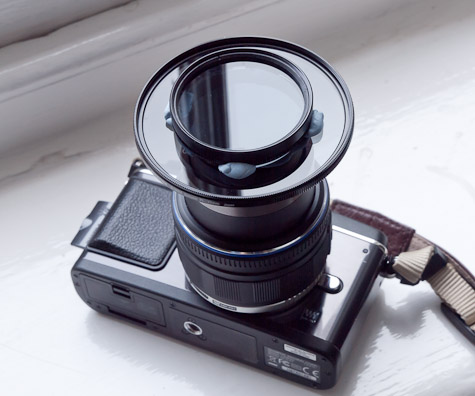
I wouldn't recommend following my example of using blu-tack to line up and attach different sized polarising filters to the camera lens like this! But it did work.
Very dark neutral density filters to enable very long shutter speeds for effect, even in full daylight, are in vogue at the moment. An example of this is Andrew Thatcher's Picture of the day from a few months back. Examples of such filters include the Lee Big Stopper, with a Big price tag of not much less than £100, while at the other end of the scale you can buy welding filters for a few pounds. The Lee filter is a high quality square filter designed for the Lee filter holder system and knocks the light by ten stops. The although these tend to exhibit a strong green cast and a are a bit tricky to mount on the camera as they are nonstandard size rectangular filters.

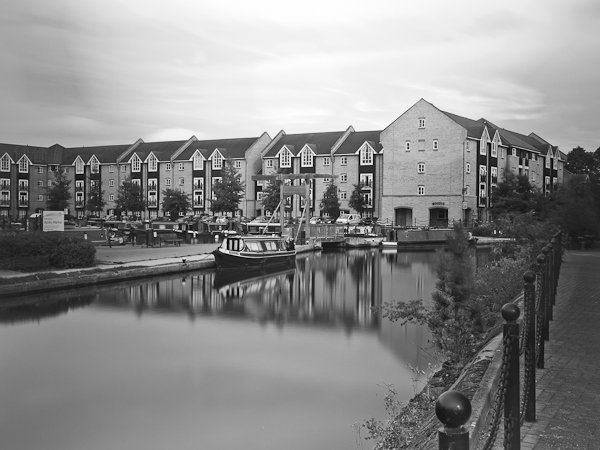
Above is the final mono-adjusted resulted produced with the help of Lightroom 3, using post-crop vignetting to balance out the lighter extremities of the original image below. The reflections in the water now have an attractive smoothed effect thanks to the 13 second exposure.
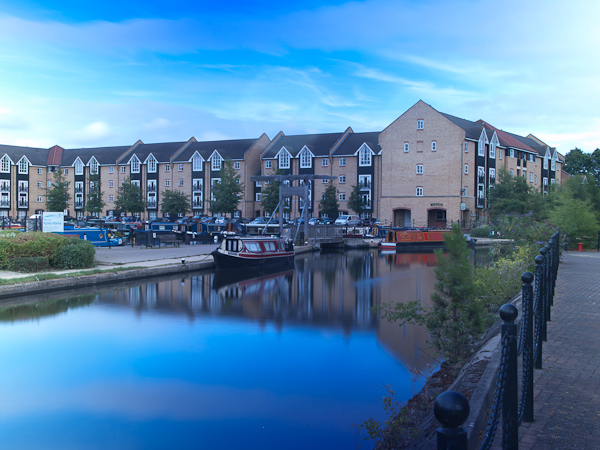
Compare the final mono result to the original colour frame. The inverse vignetting or brightening of the edges of the frame are more distinct and the blue cast is also clear. You may also be able to see some flare in the centre of the frame two thirds of the way up caused by dust in between the two filters.
Inspired by the 2001:A Space Odyssey film from 1968, when director Stanley Kubrick simulated an electronically controlled space suite helmet sun shade by rotating one polarising filter on the camera lens so darkening the polarised helmet glass of the space suit, I wondered if I could use the same trick to make my own 10 stop darkening filter. It wasn't that straightforward, but I did eventually succeed, sort of.
I happen to have sever circular polarisers in my kit bag, of varying diameters for my collection of lenses. But I soon discovered that circular polarisers don't work in the way I had hoped. If you rotate one circular polariser against another, there is only a modest change in density. You need to use at least one linear polariser. Fortunately, I did find a very old linear polariser from my film days back in the early 80s. Unfortunately, it was only a 49mm diameter item, and my smallest circular polariser is a 67mm. In the end I used the 49mm linear polariser blu-tacked to the surface of a 77mm circular polariser. The combination was then, in turn, blu-tacked to a suitably small-fronted lens. This turned out to be the 14-42mm kit zoom lens of an Olympus Pen E-P2, as you can see in the picture at the beginning of this article. I'm the first to admit that this is a very 'Heath-Robinson' arrangement and hardly practical or recommended, but I simply wanted to see if the idea would work.
This time we have a 20 second exposure, but the uneven transmission of the light caused by the extreme action of the two polarising filters has washed out the centre of the sky. On the plus side, the extra 7 seconds of exposure has made the reflections in the canal water even smoother.
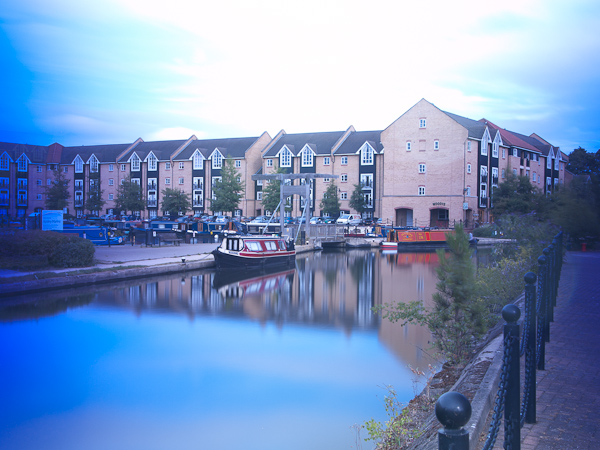
And here above is the original colour frame from the 20 second exposure.
By carefully adjusting the rotation of the linear polariser against the circular polariser, I was able to get a very decent level of darkening. I would expect it to work even better if you could lay your hands on two linear polarisers.
The normally exposed scene of the canal and longboat marina near our office in Apsley was shot at 1/200th @f/7.1, and I did get the exposure to 20 seconds at f/8 under the same conditions using the doubled-up polarisers. And that is about ten stops of light reduction. The best result came in at 13 seconds exposure, so more like 9 stops, but that's pretty impressive.
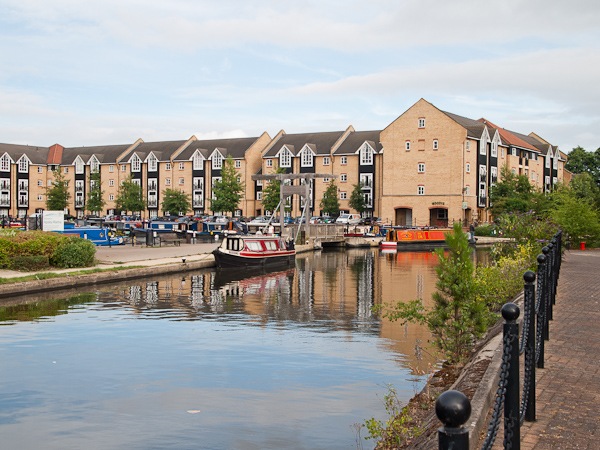
Finally, a normally exposed view, with a shutter speed of 1/200th second. The ripples on the water's surface are very well defined.
My experiment wasn't without problems, though. Polarising filters are notorious for strange vignetting effects and this did get progressively worse the darker the adjustment was made. There was also blue cast, so in the end I decided to convert my test shots to black and white. Dust getting in between the filters is a problem, and sometimes a very long exposure and a small aperture can cause a problem that looks like dust on the camera sensor.
I'm sure that with a a pair of polarisers of the same filter thread diameter, many of the problems I experienced could be solved. The preliminary results suggest the technique of using two polarisers is viable, and could provide an interesting alternative solution for very slow shutter speeds in normal daylight.
Reader feedback:
Discuss this story:


